
1. Faça o carregamento do código
#define PINO_LED 2
#define TEMPO 1000

void setup() {
  pinMode(PINO_LED, OUTPUT);
}

void loop() {
  digitalWrite(PINO_LED, HIGH);
  delay(TEMPO);
}
2. Faça a montagem do circuito

3. Faça o carregamento do código
#include <MechaQMC5883.h>
#include <Wire.h>

MechaQMC5883 compass;
int x = 0;
int y = 0;
int z = 0;
int angle = 0;

void setup(){
  Serial.begin(9600);
  Wire.begin();
  compass.init();
}

void loop() {
  compass.read(&x,&y,&z);
  angle = (atan2(x, y) / 0.0174532925);
  if(angle < 0){
    angle += 360;
  }
  angle = 360 - angle;
  Serial.println(angle);
  delay(1000);
}
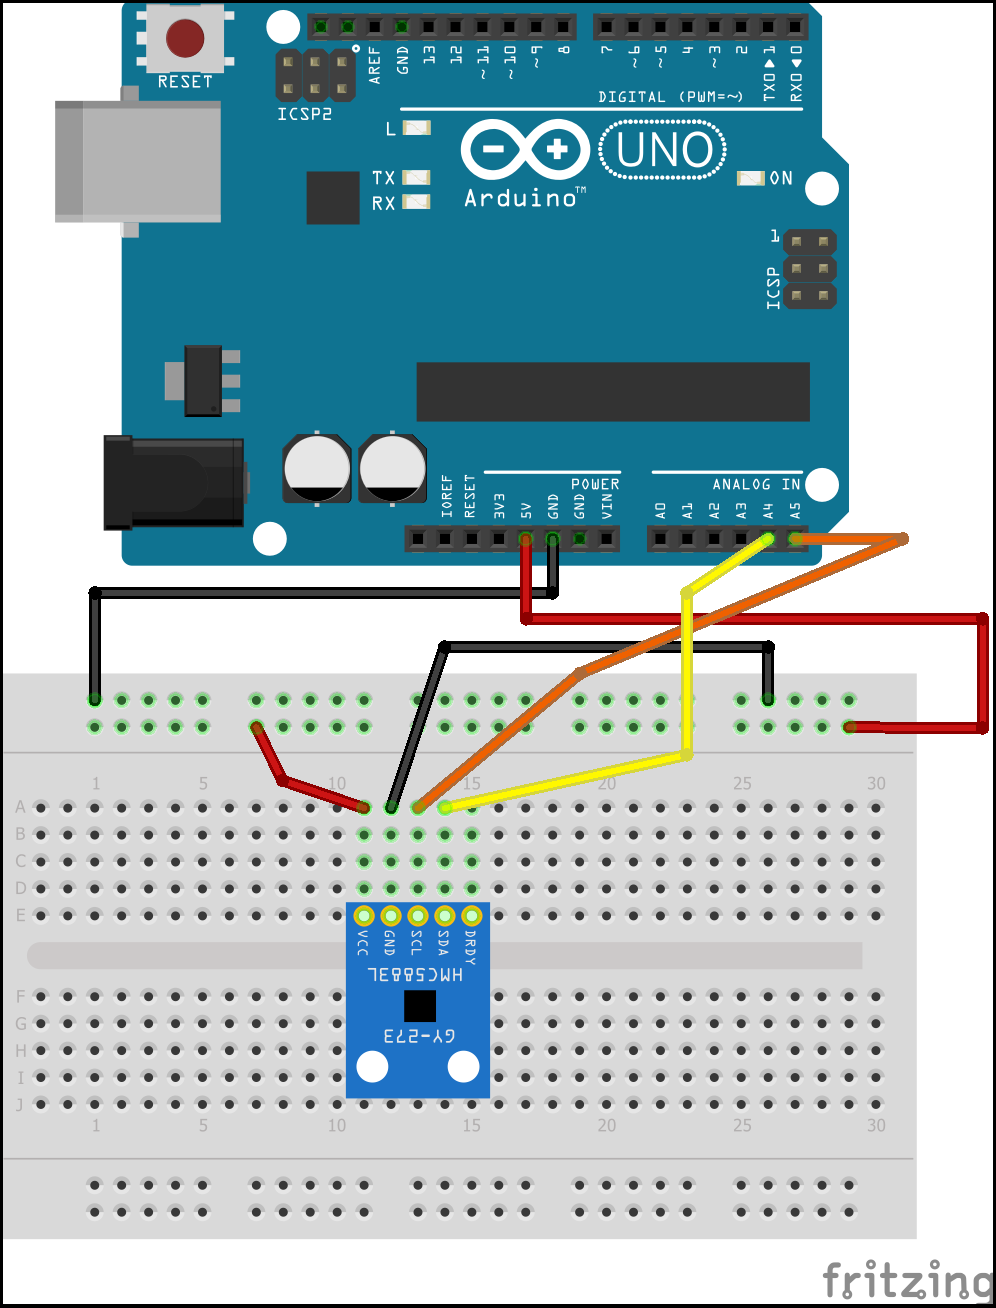
4. Faça a montagem do circuito
O módulo GY 273 utiliza o protocolo I2C (SDA para os dados e SCL para a sincronização) como forma de comunicação. Já no Arduino, você pode encontrar o protocolo I2C nas portas A4 e A5.
5. Faça o carregamento do código
#include <MechaQMC5883.h>
#include <Wire.h>

MechaQMC5883 compass;
int x = 0;
int y = 0;
int z = 0;
int angle = 0;
#define PINO_LED 2

void setup(){
  pinMode(PINO_LED, OUTPUT);
  Serial.begin(9600);
  Wire.begin();
  compass.init();
}

void loop() {
  compass.read(&x,&y,&z);
  angle = (atan2(x, y) / 0.0174532925);
  if(angle < 0){
    angle += 360;
  }
  angle = 360 - angle;
  if(angle > 140 && angle < 170){
    digitalWrite(PINO_LED, HIGH);
  }
  digitalWrite(PINO_LED, LOW);
}
6. Monte os circuitos dos passos 2 e 4 no mesmo Arduino/protoboard
Seja feliz.